Packaging
At a minimum, we need a dedicated server to deploy along with the backend. We technically can test Playing in Editor (PIE) as Standalone mode to test as a client with the actual dedicated server, but we're going to package the client build as well for this guide.
This guide shows you how to package both client and dedicated server builds from within the Unreal Editor; you can automate this task with scripts, but that is not covered here.
Packaging Settings
If you integrated Redwood into an existing project, you need to make sure you have your packaging settings properly configured. Redwood Gameplay Templates come preconfigured, but it's helpful for you to be aware of this section before you customize the template further.
Default Maps
When you package for a dedicated server, you almost always need to have a different default map for the game than the client.
-
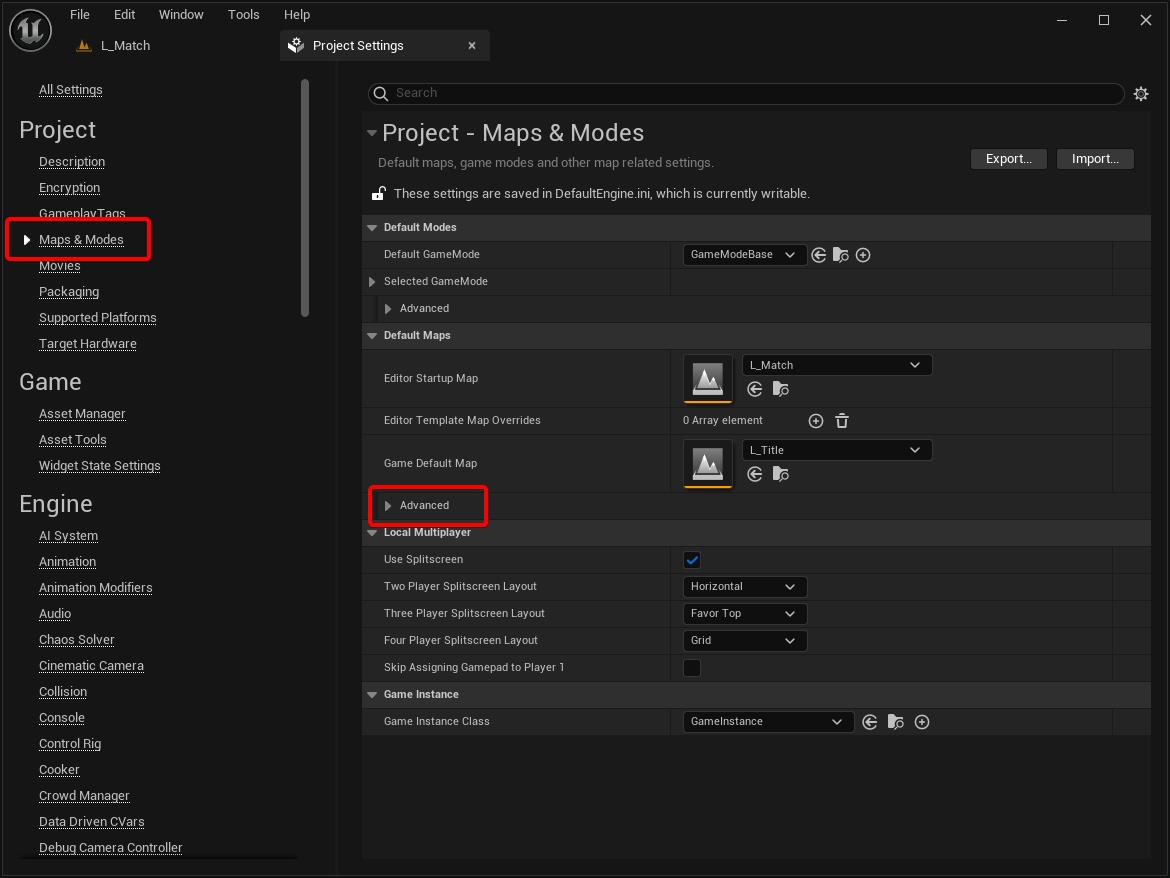
Open up the Project Settings (Edit > Project Settings)
-
Under the Project section, goto Maps & Modes
-
You'll see a section called Default Maps; expand the Advanced subsection:
-
Now you can see both the Game Default Map and the Server Default Map. The former is used for the client builds and the later is used for the dedicated server builds.
noteWe normally set the client map to a splash screen level or straight to the title screen, as seen in the Blank template.
We normally set the server map to an empty level with the default game mode. This ensures our match level doesn't get loaded until it starts, which reduces wasted RAM and CPU usage in the case of keeping warm servers (aka servers that have no players but are ready to start a match quickly if a set of players appear). Redwood automatically loads the correct map and game mode when a match gets allocated.

Packaging Maps
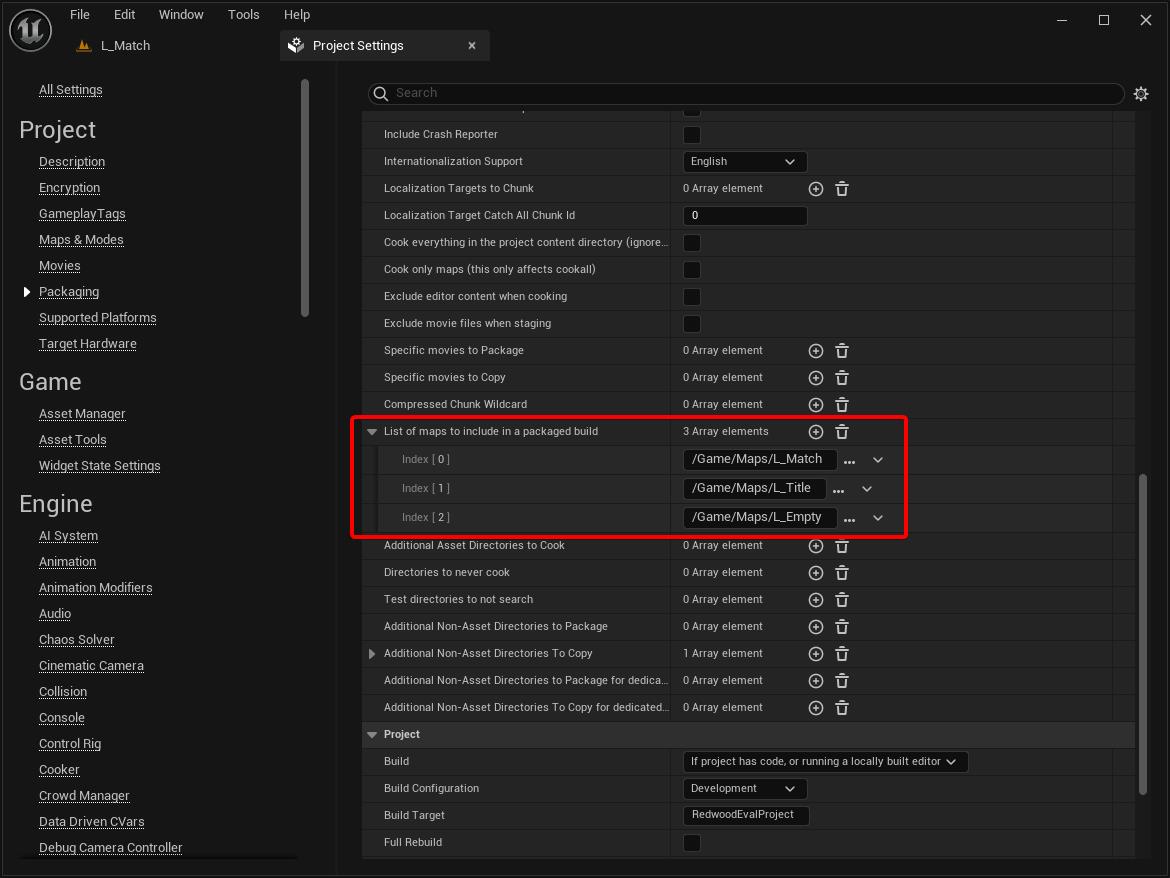
You need to make sure that all the maps you need are packaged. By default, Unreal will package all the maps and any assets that get loaded from loading each map. This is excessive and increase your package size by including assets you never use in the project. This is particularly noticed if you use any asset packs from the marketplace that include demo/showcase maps listing each asset. Which is why we always specifically call out the maps we want to package.
-
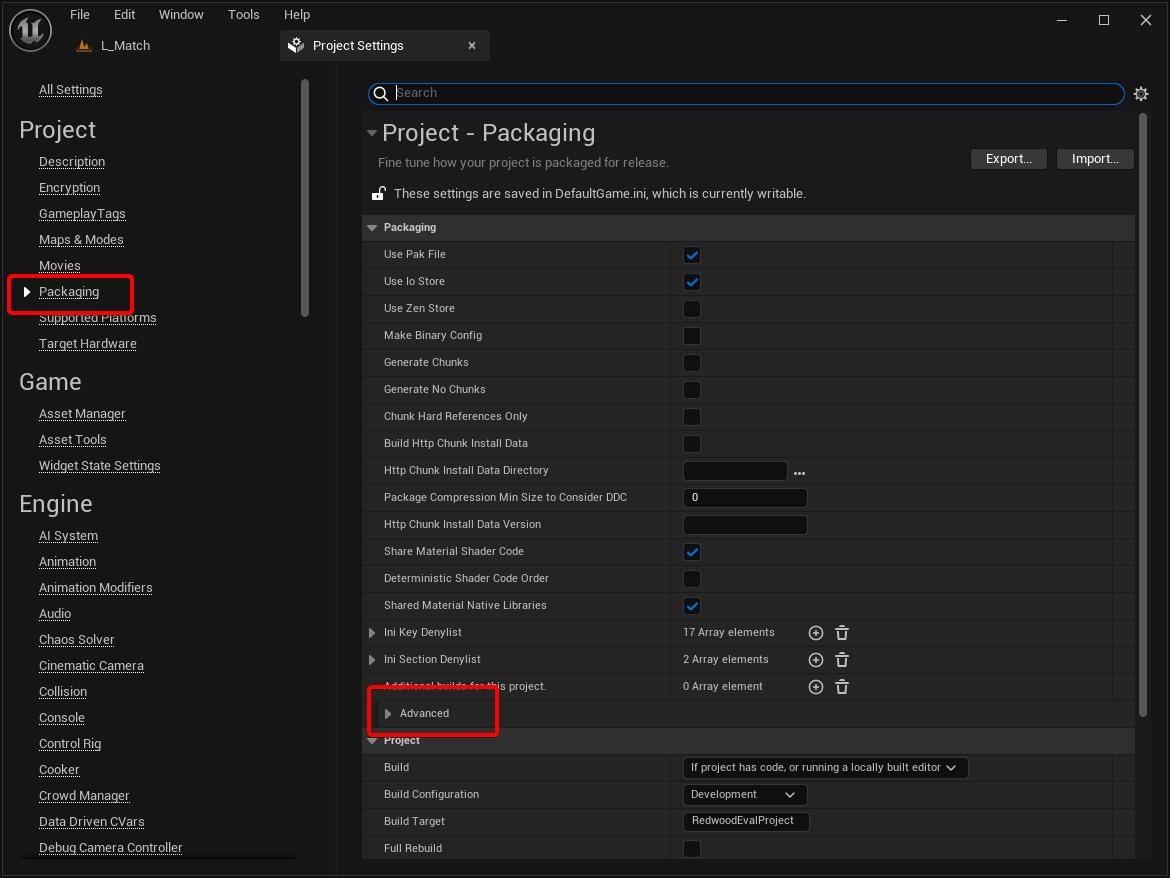
From the Project Settings tab, select Package under Project. Then be sure to expand Advanced under the Packaging section.
-
Scroll down until you see List of maps to include in a packaged build. This is normally empty, which means to include all maps. If it's non-empty, only those maps will be included.
-
Add each of your maps that your game uses. At a minimum, you must include the default maps you set, but you likely need to also include any maps used in the match. In the above picture, you'll see we included the
L_Matchmap that actually gets loaded in the Blank template to host the map.
If you ever get more advanced and use scripting to package instead of packaging through the Editor, these Packaging settings are ignored. You must manually specify these.
Also note that the client build needs to include all maps, but the server build could technically omit the client-only builds (e.g. L_Title in the case of the Blank template). We don't normally make this distinction in our own build scripts as it usually doesn't impact build size greatly but can sometimes cause missing maps in one of the builds.
Client Build
Now that we have our package settings properly configured, we will start with packaging the Windows Client build.
-
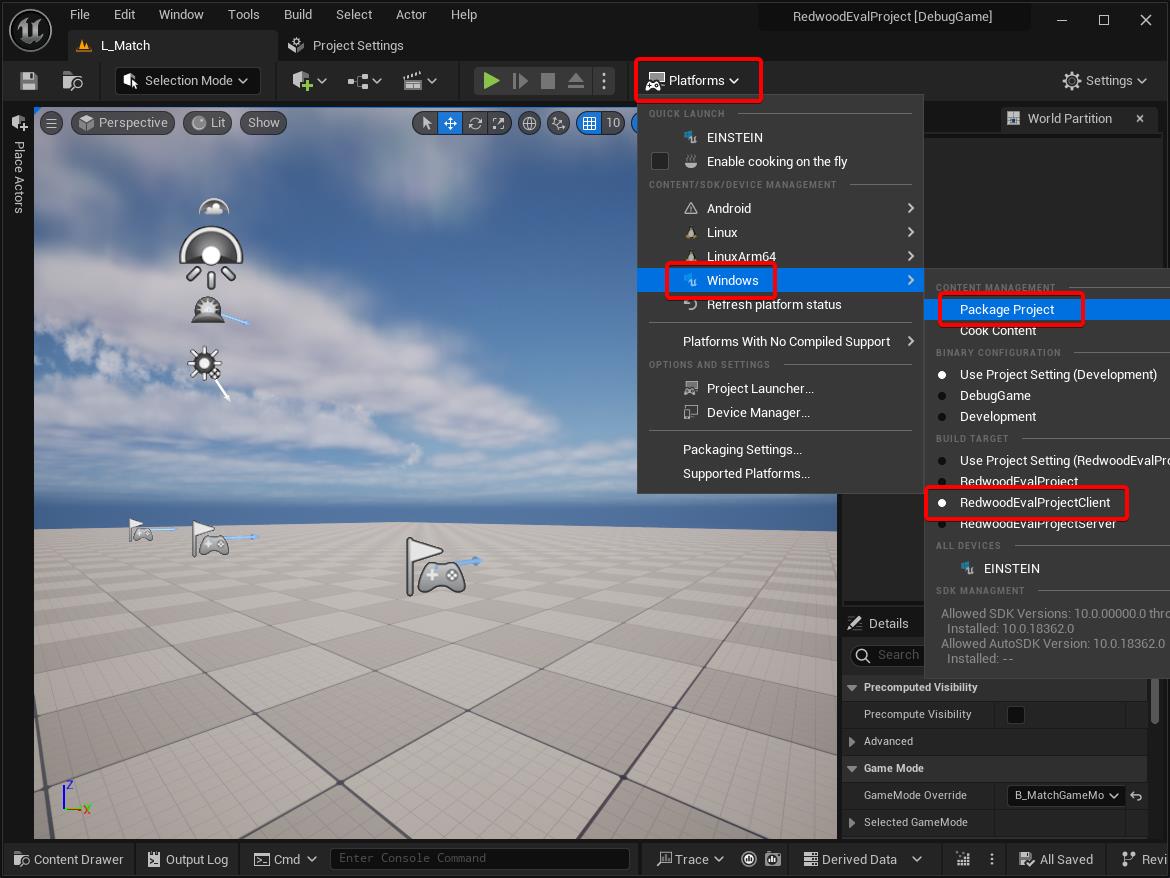
Navigate to the currently open level tab
-
Click on Platforms in the toolbar, navigate under the Windows menu
-
Make sure that the Build Target has your
Clientbuild selected (Usually hasClientat the end); you can have anything selected for the Binary ConfigurationinfoWe don't want to use the default
Gametarget here.Gameincludes both client and server code. Only useGameif you plan to support Listen Servers.Pro tip: When selecting a Build Target or Binary Configuration, click on the bubble/ball on the left instead of the name/row. This will prevent the menu from closing.
-
Click on Package Project; you can pick any directory you prefer for now
Dedicated Server Build
Setting up the Linux Toolchain
When building the dedicated server build, we actually want to target the Linux OS. Linux servers are cheaper in hosting providers so we need to make sure that we can cross-compile for Linux (which means to compile for Linux on a Windows system).
-
Navigate to the Unreal documentation and find the link for the Cross-Compile Toolchain for your UE version
noteYou do not want the Native Toolchain unless you're building for Linux on a Linux machine.
-
Run the executable once it has finished downloading
-
Click Next
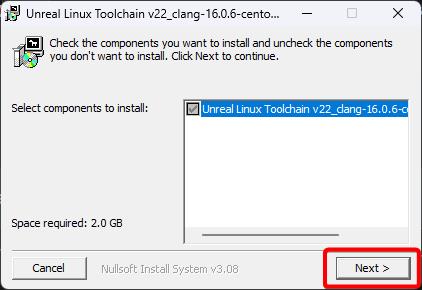
-
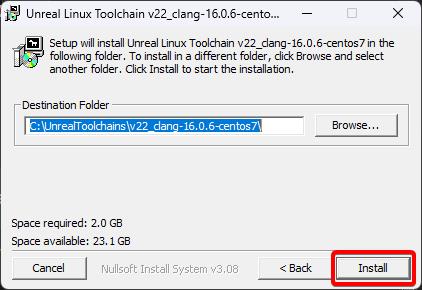
You can change where the toolchain is installed, but we normally use the default; click Install when you're ready
-
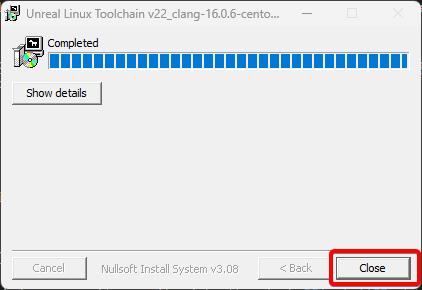
Click Close once the installer finishes
-
Add the
LINUX_MULTIARCH_ROOTenvironment variable that points to the path that you installed the toolchain at-
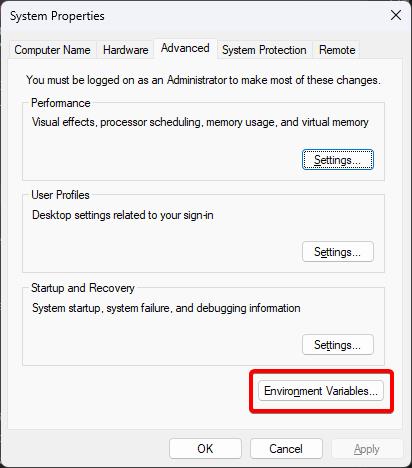
Open the Start menu and search for
Edit the system environment variables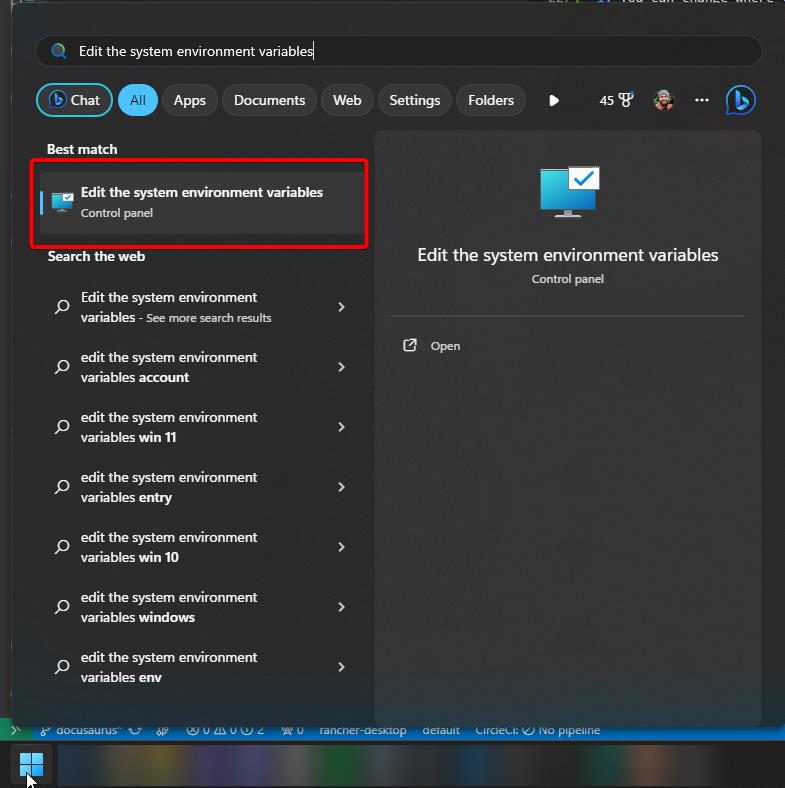
-
Click on the Environment Variables... button
-
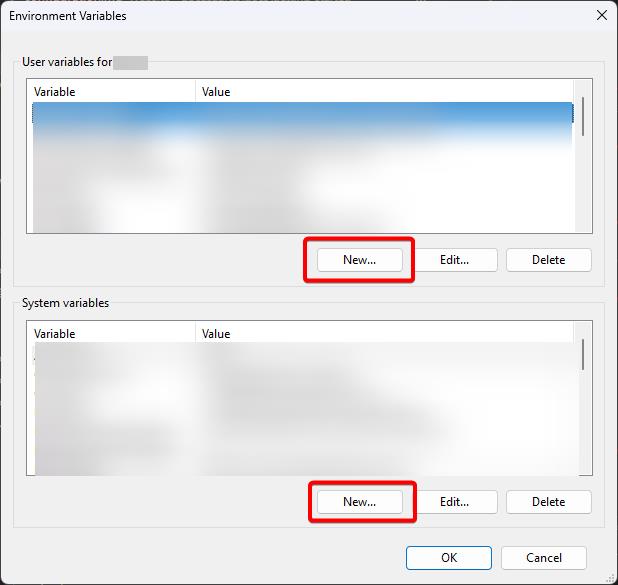
Click on either the User or System environment variables New... button; either should work
infoThe installer may have already set this under the System variables, so double check before adding it.
-
Add the new
LINUX_MULTIARCH_ROOTvariable with the install path as the value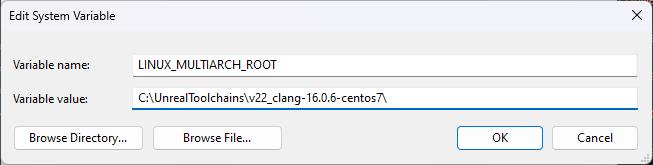
-
Click the OK button on the new system variable window
-
Click the OK button on the Environment Variables list window
-
Click the OK button on the System Properties window
-
You will need to restart the Unreal Editor; if you opened it from an IDE, you may need to restart that too for it to take effect
noteStill having issues with your environment variable? You can log out and log back into Windows to fully take effect.
-
-
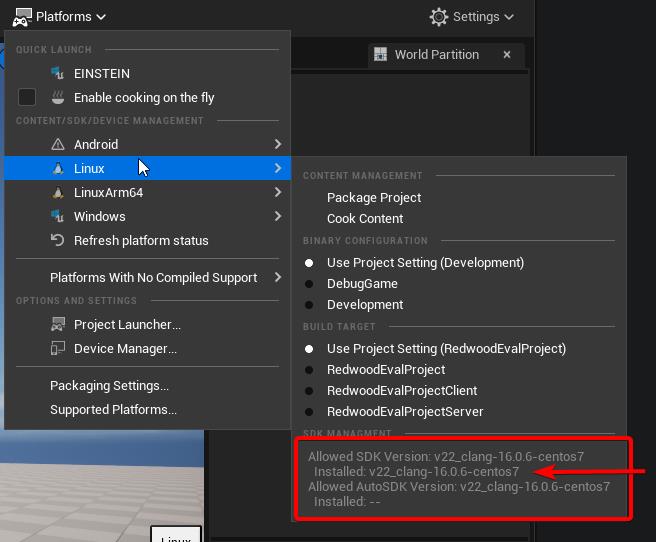
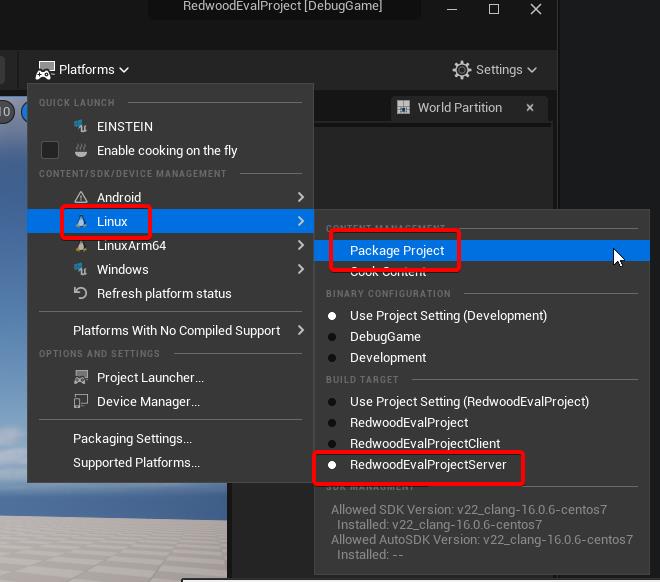
Under the Platforms menu in the toolbar, open the Linux submenu
-
To verify you have installed the toolchain and set up the environment variable properly, check under the SDK MANAGEMENT section to see if the correct/matching SDK version is listed as Installed either under the SDK or Auto SDK:
Executing the Build
The steps here are identical to packaging the client build except you're choosing Linux and the Server target:
Now that you have a packaged server, you can deploy to a local or remote Kubernetes cluster!