Epic Account Services Authentication
The epic provider uses the Epic Game Account Services (which is a subservice of Epic Online Services). You do not need to use any other part of EOS to use this provider. This provider can be used to manually prompt the user to login with Epic or to automatically login with Epic if they launched the game via the Epic Games Launcher.
Configuration
There's no specific configuration for this provider.
Setup
I'd love to give you instructions on how to set up
-
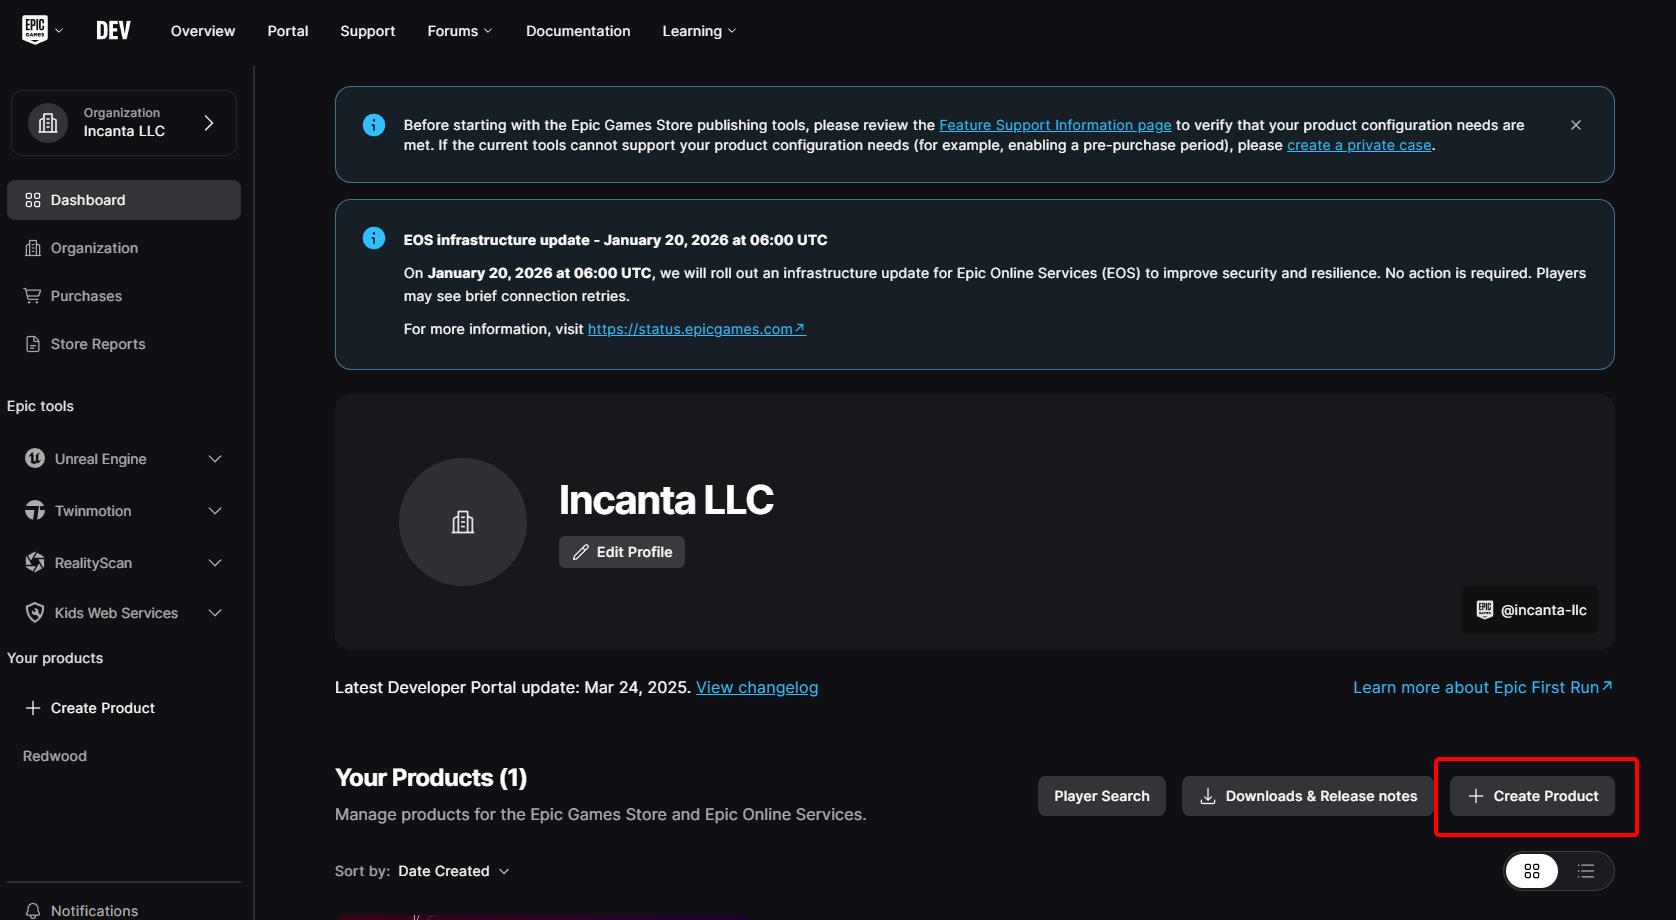
Sign in to the Epic Dev Portal
-
Create or select an organization
-
Under the Dashboard for that organization, click + Create Product
-
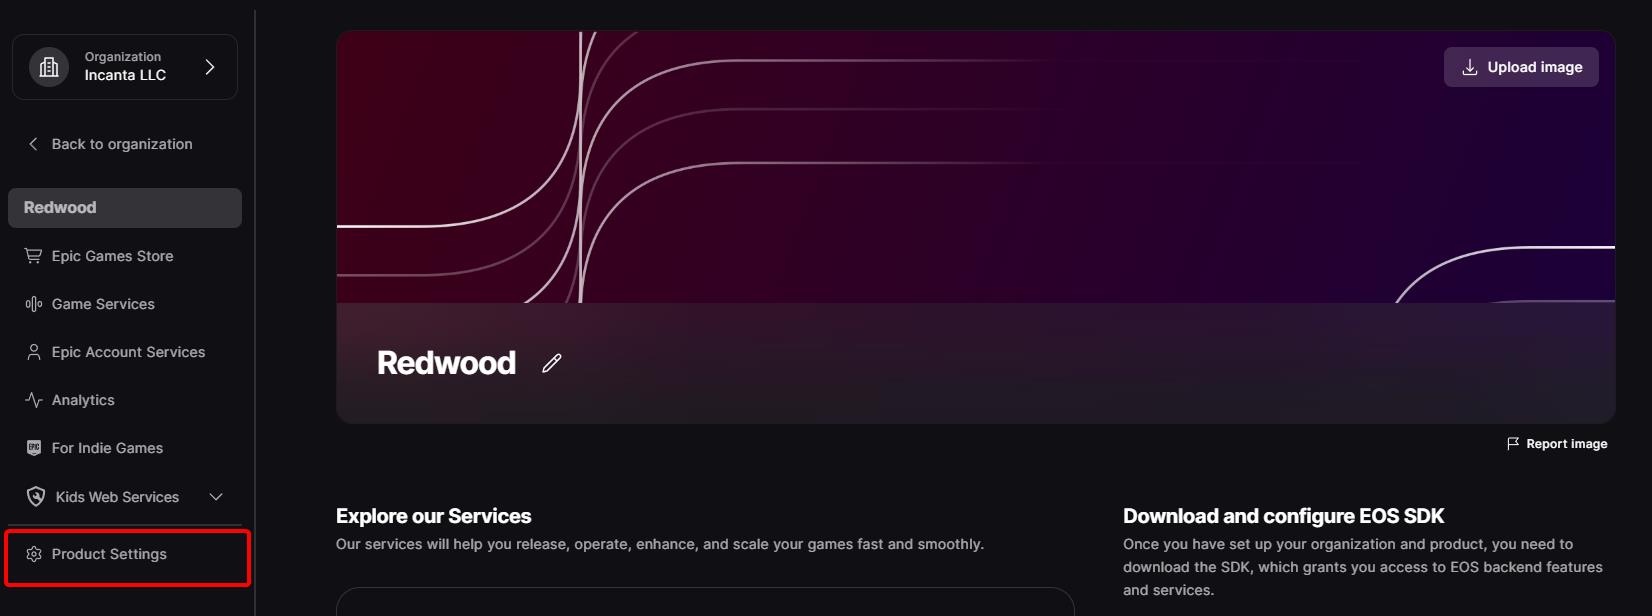
Under the dashboard for the product, click Product Settings
-
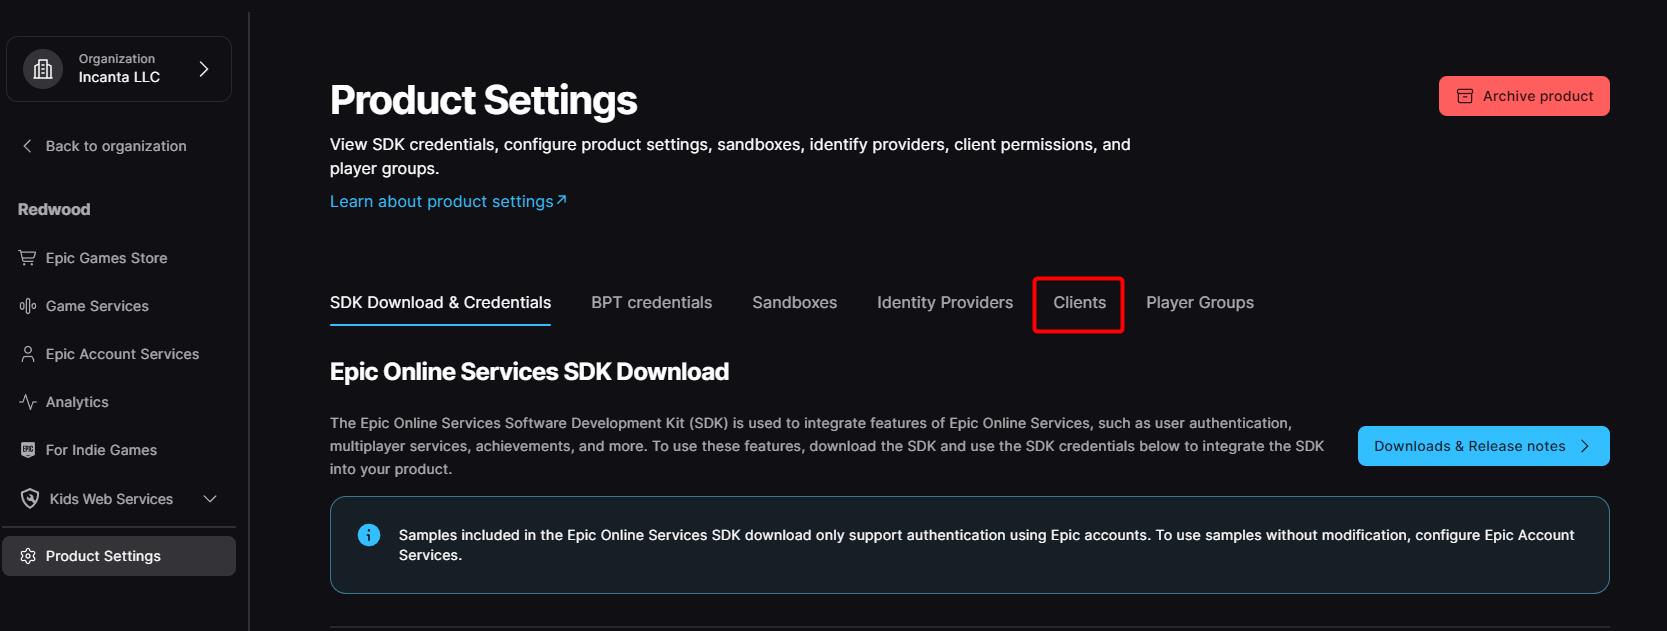
Click on the Clients tab
-
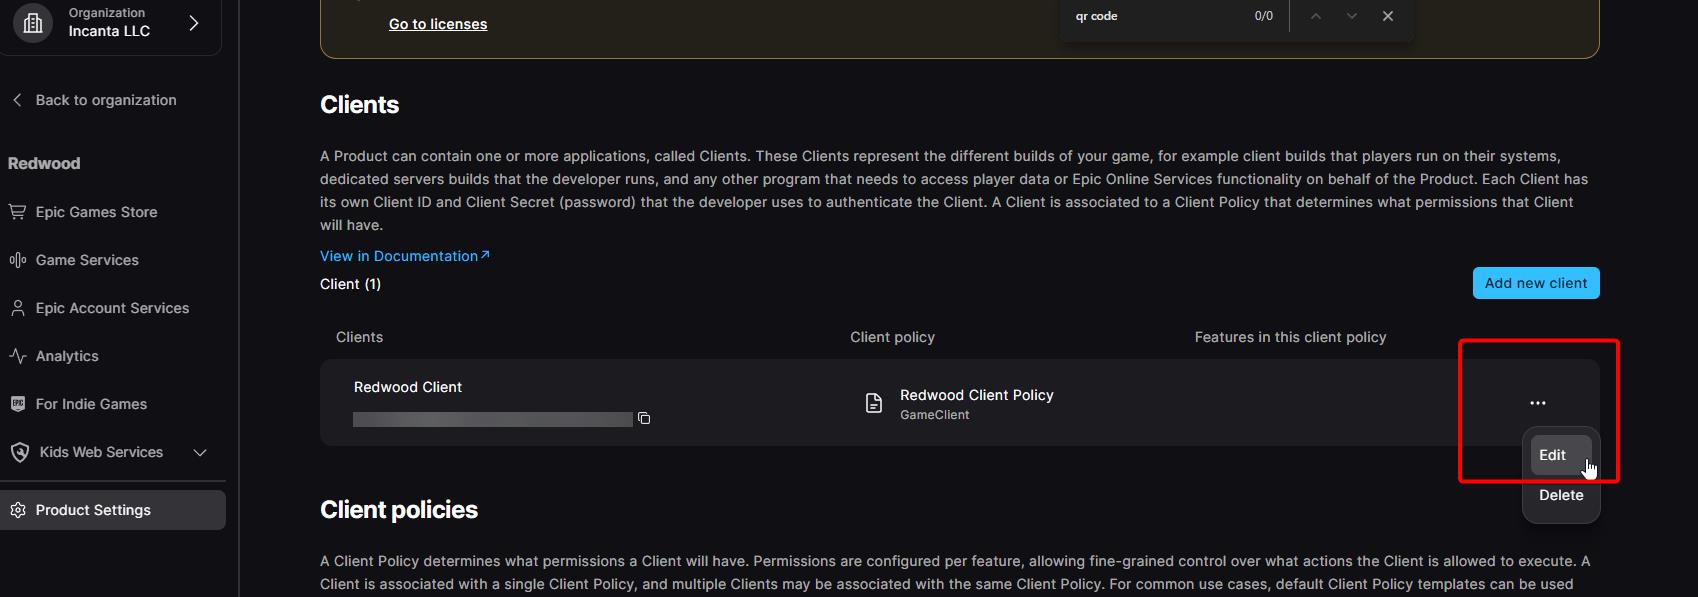
Scroll down and click Add new client
-
Give it a Client Name (e.g.
YourGame Game Client) -
Under Client Policy dropdown, click Create a new client policy
-
Give the policy a name (e.g.
YourGame Client Policy) -
Select
GameClientfor the Client policy type -
Click Add new client policy
-
You should be back in the Add new client modal; make sure the new client policy is selected in the dropdown
-
You can leave Trusted Server IP allow list empty
-
You can leave the Redirect URL empty
-
Click Add new client to save the changes
-
Edit the client you just created
-
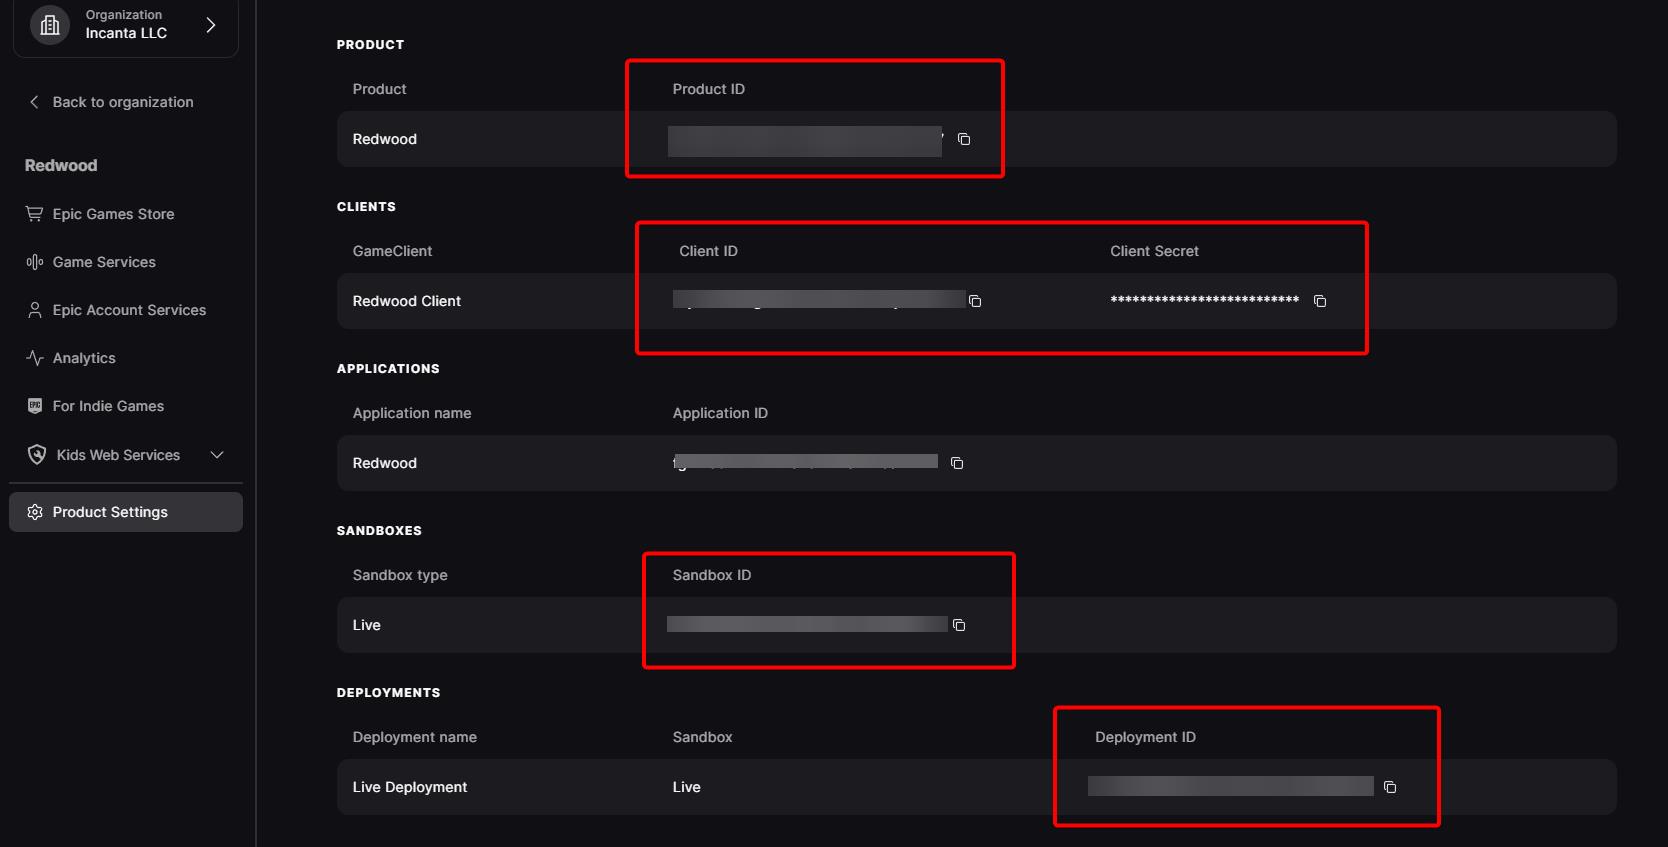
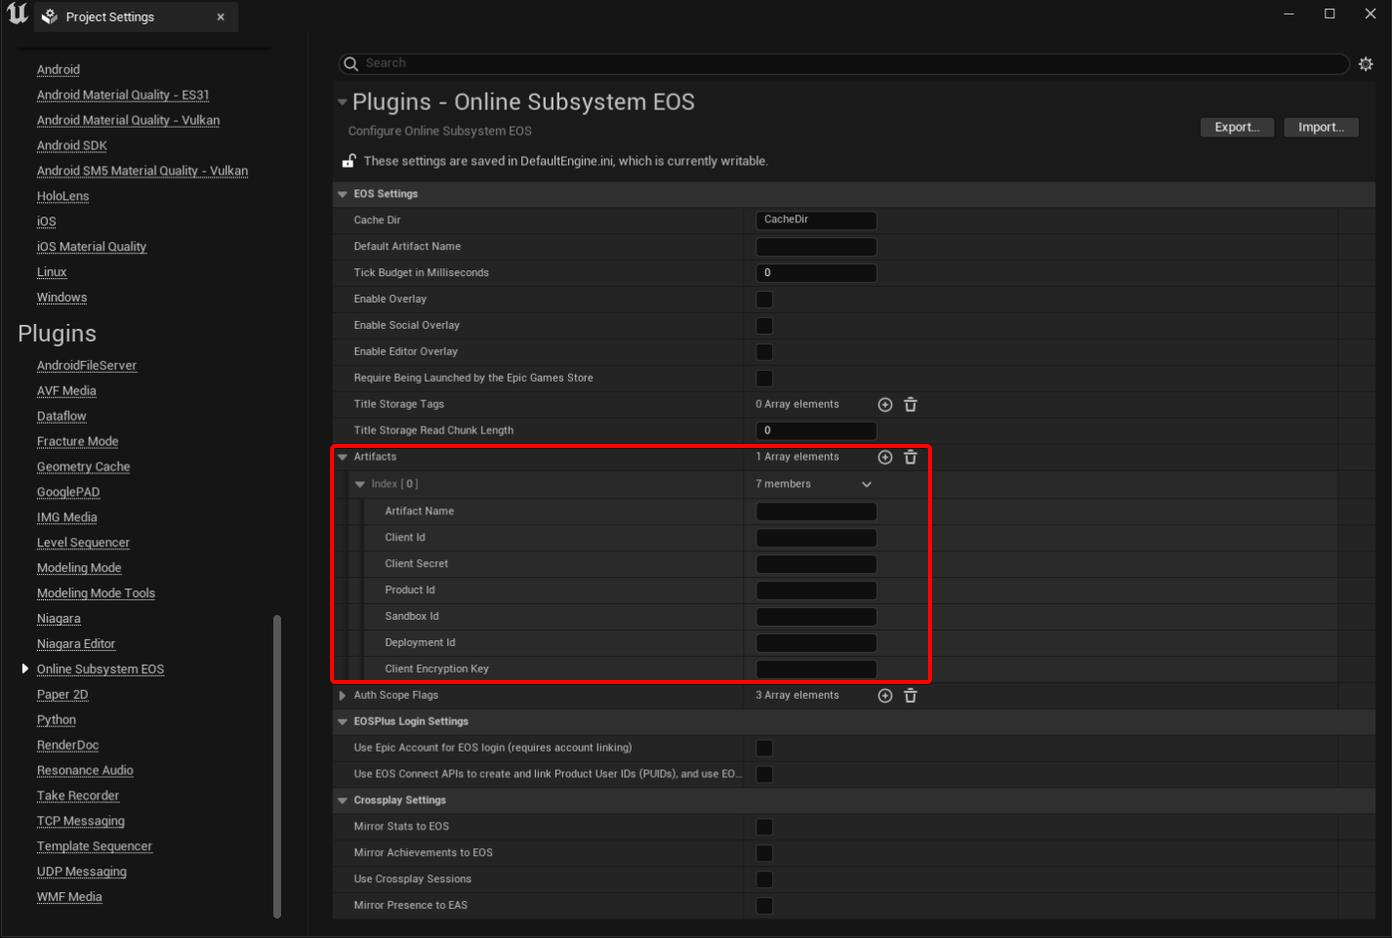
Go to the Product Settings page and copy the Product ID, Client ID, Client Secret, Sandbox ID, and Deployment ID and paste the values as a new Artifact in the online Subsystem EOS section in UE's Project Settings.
-
The Artifact should also have a name (like your game name), the
Product ID -
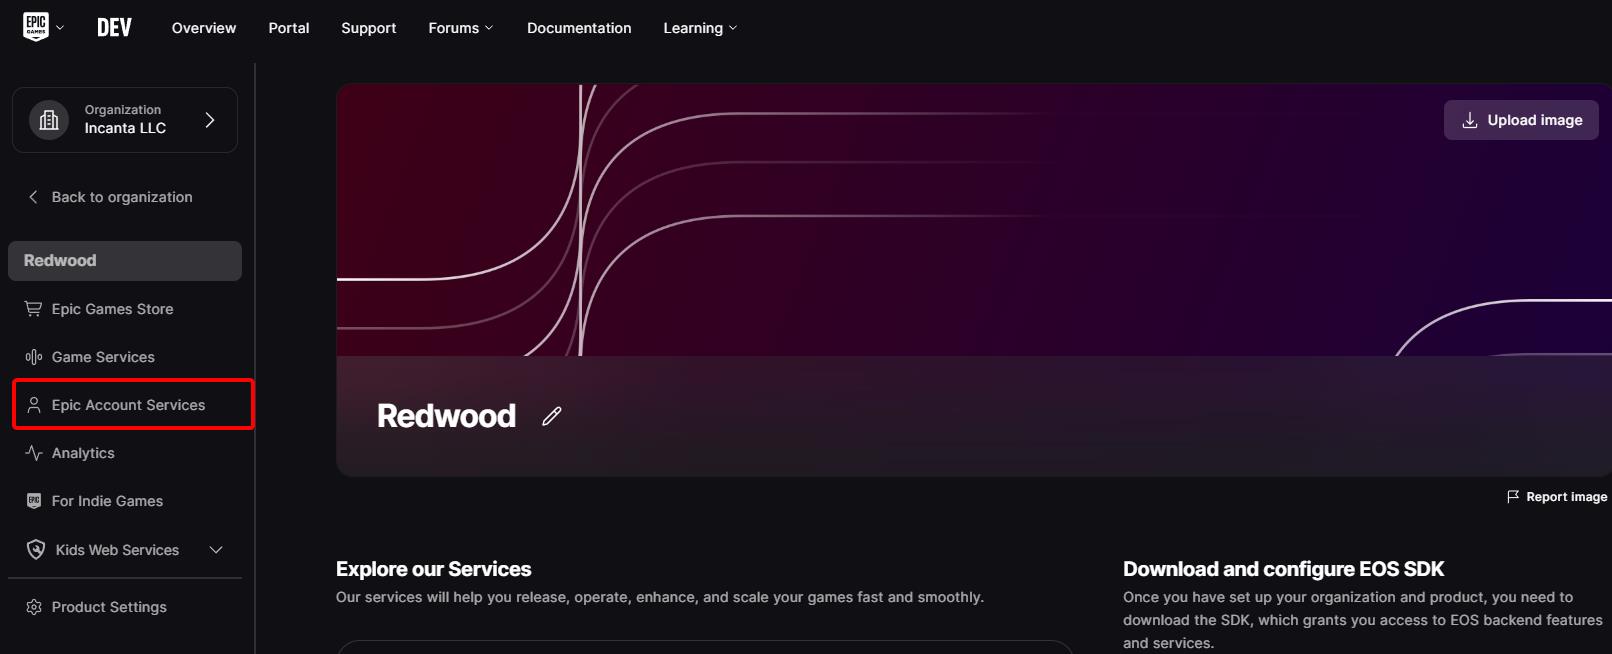
Click Epic Account Services in the sidebar
-
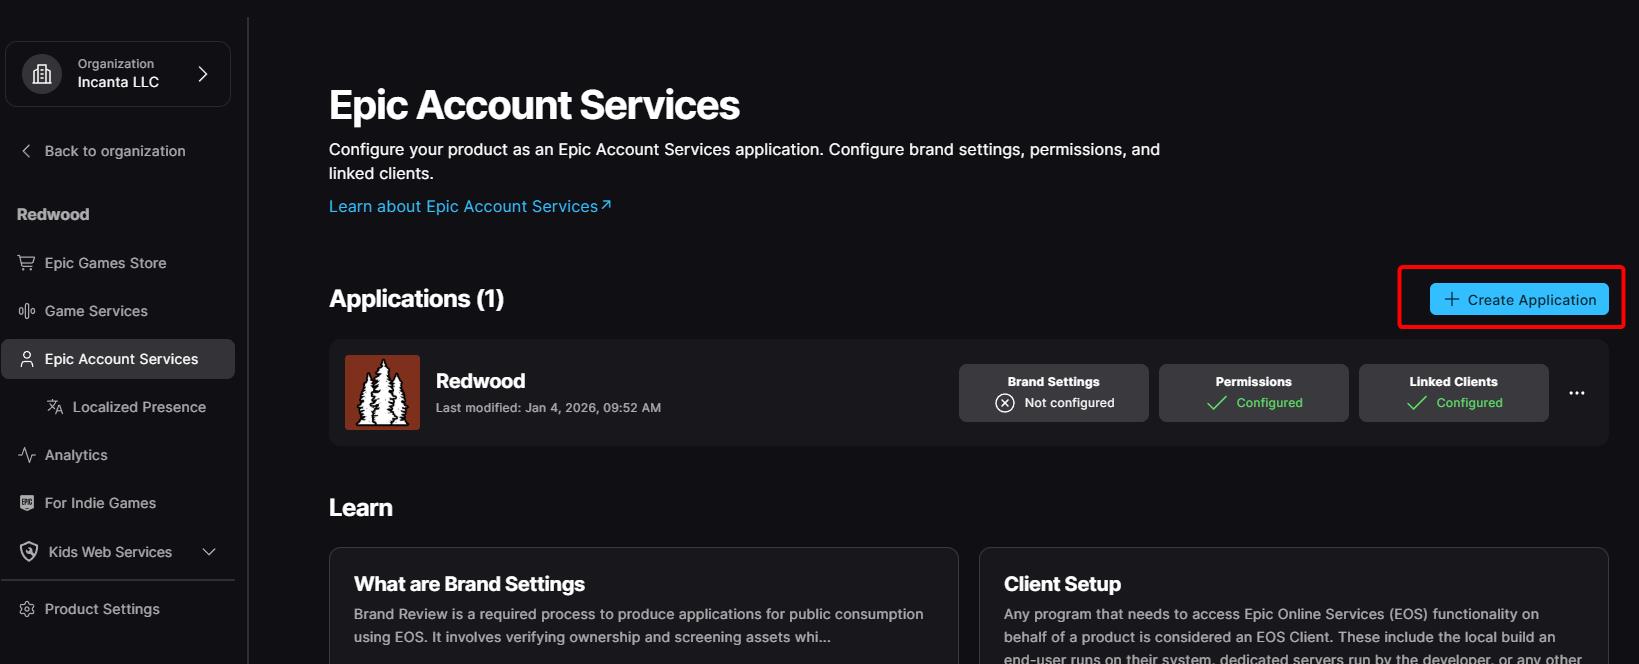
Click + Create Application
-
I'm not going to go into every detail here, but note that under Permissions you only need Basic Profile enabled (it's required anyway). Linked Clients should have the dropdown selected for the client you just created.
-
Click Save changes
-
Enable the
RedwoodEOSplugin by manually adding it to your.uprojectfile or viaEdit > Plugins -
Prior to calling the Redwood backend function to login, you'll need to ensure the player is logged in with EOS first. The plugin provides a few options for you (both BP and C++):
Login EOS Dev Auth ToolorURedwoodEOSClientInterface::LoginEOS_DevAuthTool- As part of the EOS SDK download found under your organization Dashboard via Downloads & Release notes (historically in
SDK/Toolsafter unzipping), there is a developer authentication tool. You start it up, pick a port (defaults to6300), then click Login to add a credential. You then login with a real Epic Games account and then are prompted for a credential name. Redwood defaults to usingContext_1, but you can use something else. While this application is running, calling this function will automatically authenticate you with EOS.
- As part of the EOS SDK download found under your organization Dashboard via Downloads & Release notes (historically in
Login EOS Prompt Account PortalorURedwoodEOSClientInterface::LoginEOS_PromptAccountPortal- This is the most cross-platform supported method. Calling this function will open the browser to login with Epic Games.
Login EOS Epic Games LauncherorURedwoodEOSClientInterface::LoginEOS_PromptAccountPortal- This only works if you are launching the game via the Epic Games Launcher in production.
- You can "auto login" without calling any of these functions for packaged games by following the official docs.
noteI've sometimes noticed these functions not behaving as I'd expect (e.g. returning false even though the auth was successful) for the initial auth; subsequent auths would succeed. If you're seeing similar behavior and this is blocking you (e.g. in a non-development scenario), reach out.
-
Update your project to use the
Login with EOSfunction instead of the normalLoginfunction.- This function has the same auth update callback/delegate as the normal
Loginfunction. - You can use the
Login with EOSlatent Blueprint node that usesRedwoodClientGameSubsystem - You can also use the C++ function:
- Add the
RedwoodEOSmodule to your.Build.csfile - Include
RedwoodClientInterface.h,RedwoodClientGameSubsystem.h, andRedwoodEOSClientInterface - Get a reference to the active Redwood Client interface:
URedwoodClientInterface *ClientInterface = GetGameInstance()->GetSubsystem<URedwoodClientGameSubsystem>()->GetClientInterface(); - Call
LoginWithEOS; be sure to replaceOnUpdatebelow as applicable to handle the auth callback:URedwoodEOSClientInterface::LoginWithEOS(ClientInterface, FRedwoodAuthUpdateDelegate OnUpdate);
- Add the
- This function has the same auth update callback/delegate as the normal
-
Update your UE project's
Config/DefaultEngine.inito enable the EOS online subsystem, but making sure that you don't enable the EOS networking settings found in other EOS setup guides. Here is what a basic config may look like (as of Jan 2026):[/Script/OnlineSubsystemEOS.EOSSettings]
CacheDir=CacheDir
DefaultArtifactName=GameName
RTCBackgroundMode=
TickBudgetInMilliseconds=0
bEnableOverlay=False
bEnableSocialOverlay=False
bEnableEditorOverlay=False
bPreferPersistentAuth=False
TitleStorageReadChunkLength=0
+Artifacts=(ArtifactName="GameName",ClientId="***",ClientSecret="***",ProductId="***",SandboxId="***",DeploymentId="***",ClientEncryptionKey="")
-AuthScopeFlags=BasicProfile
-AuthScopeFlags=FriendsList
-AuthScopeFlags=Presence
bUseEAS=True
bUseEOSConnect=False
bMirrorStatsToEOS=False
bMirrorAchievementsToEOS=False
bUseEOSSessions=False
bMirrorPresenceToEAS=False
SteamTokenType=Session
[OnlineSubsystemEOS]
bEnabled=true
[OnlineSubsystem]
DefaultPlatformService=EOSwarningDO NOT change the NetDriver that you might find in other guides on setting up Steam with Unreal.